You wake up with a scratchy throat, reach for lotion for the third time today, and notice your toddler rubbing her itchy eyes again. Winter has turned your home into a desert, and your family is paying the price. The culprit? Bone-dry indoor air that's stealing moisture from everything—including the people you love most.
Low humidity isn't just uncomfortable; it affects your children's respiratory comfort, your skin's resilience, and even the integrity of your home's wooden furniture and floors. Dry winter air triggers a cascade of health issues from worsened asthma to nosebleeds, making it especially challenging for families managing allergies or respiratory sensitivities.
The good news: you don’t need complicated systems to fix it. There are simple, natural ways to increase humidity in a room using moisture you already create every day.
This guide walks you through what actually works—and how to do it safely.
Why Rooms Get Dry (and What “Good” Humidity Looks Like)
Understanding how to increase humidity in a room starts with grasping why winter air becomes so parched in the first place. The science is straightforward: cold outdoor air holds significantly less water vapor than warm air. When your heating system pulls in that cold air and warms it up, the relative humidity—essentially how "full" the air is compared to its maximum moisture capacity at that temperature—drops dramatically.
Think of it this way: heating cold air makes it expand and become "thirsty," pulling moisture from wherever it can find it. That includes your skin, your sinuses, your houseplants, and even the wood in your furniture. Your furnace doesn't just heat the air; it creates an environment where moisture evaporates faster than it can be replaced naturally.
The Ideal Humidity Range
The sweet spot for indoor humidity sits between 30–50% relative humidity (RH) for most homes. But there's a seasonal nuance worth noting. In winter, staying closer to 30–40% helps prevent condensation on windows. Higher levels may feel more comfortable but can increase mold risk if not managed carefully.
To track your home's humidity accurately, invest in a standalone hygrometer—a small, inexpensive device available at most hardware stores. Place it away from moisture sources like bathrooms or humidifiers for the most accurate reading. Here's a critical tip: don't rely on built-in sensors in humidifiers themselves. These sensors sit right next to the mist output and tend to read artificially high, giving you false confidence while the rest of your room remains dry.
Signs Your Air Is Too Dry
-
Irritated, scratchy throats and dry nasal passages
-
Itchy, watery eyes
-
Cracked, flaking skin that no amount of lotion seems to fix
-
Worsened symptoms for family members with asthma or allergies
-
Increased static electricity (those annoying shocks when you touch doorknobs)
-
Cracking wood floors or furniture
But here's the crucial balance: the goal is controlled moisture, not maximum moisture.
Signs It’s Too Humid
-
Foggy or wet windows
-
Condensation on cold surfaces
-
Musty Smells
This baseline understanding sets the stage for every method that follows—you're not just adding moisture randomly; you're creating a healthier, more comfortable breathing environment for your family while staying safely below the mold-risk threshold.
Fastest Ways to Raise Humidity Today
The quickest path to relief doesn't require a shopping trip—it requires redirecting moisture you're already creating every day. Your daily routines generate surprising amounts of water vapor that typically escapes outdoors or gets vented away. By capturing and redistributing this steam strategically, you can increase humidity in a room within hours.
The Simmer Pot Method: Rapid Moisture When You Need It Most
Fill a pot with water, set it on your stove at a gentle simmer, and let physics do the work. Warm water evaporates continuously, releasing steady moisture into your kitchen and adjacent rooms for 20–60 minutes while you're home.
The key word here is simmer, not boil. A rolling boil evaporates water faster but creates safety risks and wastes energy. A gentle simmer provides constant evaporation without the drama.
Want to make this method even more pleasant? Add citrus peels, cinnamon sticks, or a splash of vanilla extract to the water. Your home gains moisture and a cozy seasonal scent—no candles or plug-ins required.
Turn Dinner Prep Into a Humidity Boost
Stop thinking "cook more" and start thinking "cook smarter." The meals you're already preparing can double as natural humidifiers if you adjust your technique slightly.
Focus on moisture-rich cooking methods:
-
Soups and stews: These simmer for extended periods, releasing steady steam into your kitchen
-
Pasta and rice: Boiling large pots of water creates significant vapor
-
Steamed vegetables: The steaming process transforms liquid water directly into airborne moisture
Here's the adjustment that makes the difference: keep pot lids slightly ajar while cooking. Fully covered pots trap steam inside, where it condenses back into liquid and returns to the pot. A small gap lets that moisture escape into your home's air instead.
Redirect Shower Steam to Where Your Family Sleeps
Your morning shower generates a cloud of warm, humid air—and then you immediately vent it outdoors with the exhaust fan. During dry winter months, that's throwing away exactly what your home needs.
Try this instead: crack the bathroom door during and after hot showers. Let the steam drift naturally into hallways and bedrooms where your family spends time.
Here's the practical timing note: if your home is very dry, consider delaying the exhaust fan for 10–15 minutes after showering. The fan serves an important purpose—preventing mold in the bathroom itself—but running it immediately removes all that beneficial moisture before it can help the rest of your home.
For families with multiple bathrooms, this strategy works even better. Morning showers in one bathroom can humidify nearby bedrooms; evening showers in another can add moisture to living spaces.
The Bathwater Trick: Set-It-and-Forget-It Evening Moisture
If anyone in your household takes baths, here's a zero-effort humidity boost: let the warm bathwater sit for 30–60 minutes before draining it. The large surface area of a filled tub provides exceptional evaporation potential as the water gradually cools.
This works because evaporation rate depends heavily on surface area. A bathtub exposes far more water to air than a drinking glass or even a cooking pot, meaning moisture transfers into your home's air faster and more consistently.
This method requires literally no extra effort beyond remembering not to pull the plug immediately. For busy parents managing multiple bedtimes, that's exactly the kind of passive solution that actually sticks.
Passive Ways to Add Humidity All Day
The methods above work beautifully when you're home and actively managing them. But what about the eight hours you're at work, or the weekend morning when you'd rather play with your kids than tend to a simmering pot?
Passive humidity strategies run themselves. Set them up once, and they release moisture steadily throughout the day with zero supervision required.
Use Wide Bowls of Water
Place shallow bowls of water:
-
On shelves or dressers
-
Near windows
-
In sunny spots
Wider containers = more surface area = faster evaporation.
Replace water every few days.
Pair Water Near Heat Sources
Your heating system already moves warm air throughout your home. Strategic water placement turns that airflow into a moisture delivery system.
For homes with radiators, the setup is beautifully simple: place heat-safe ceramic or metal bowls directly on top of each unit. The radiator's warmth heats the water from below, creating steady evaporation throughout the day.
Traditional radiator humidifiers—ceramic containers with hooks that hang over the radiator—have been used for generations for exactly this purpose.
If you have forced-air heating, position bowls near (not directly on) floor vents. The rising warm air from the vent carries moisture upward and outward as it circulates.
One practical note: check water levels every few days. Radiators and vents accelerate evaporation, which means these containers empty faster than bowls placed elsewhere in the room.
Turn Laundry Day Into a Humidity Opportunity
Hang-drying one load of laundry indoors releases significant moisture over 6–12 hours. As wet fabrics dry, they function essentially as a slow-release humidifier that requires zero electricity and no maintenance beyond the drying rack you likely already own.
Position the rack in your home's driest zone—often a bedroom or living room farthest from the kitchen and bathroom. If possible, place it near (but not blocking) a heating vent. The airflow speeds drying while distributing moisture throughout the space.
This method delivers benefits that matter to health-conscious families beyond just humidity. Air-drying uses no energy, cutting your utility bills and reducing your environmental footprint. It's also gentler on fabrics than tumble drying, extending the life of kids' clothes, workout gear, and delicate items.
One load per week might be enough if you're using other methods simultaneously. Families dealing with severe dryness can hang-dry multiple loads, rotating racks between rooms to distribute moisture evenly.
The Dishwasher Steam Hack You're Currently Wasting
Your dishwasher's final rinse cycle heats dishes to temperatures well above 140°F. That heat creates a cloud of steam trapped inside the closed machine—steam that typically stays sealed until dishes cool, then dissipates when you open the door hours later.
Here's the adjustment: after the final rinse completes, crack the dishwasher door open and pull the racks out slightly. Hot dishes air-dry naturally while releasing their trapped steam into your kitchen.
Safety reminder for families with young children: those dishes and the dishwasher interior remain dangerously hot for 15–20 minutes after the cycle ends. If you have toddlers, wait until they're in another room or use a baby gate to block kitchen access while dishes cool.
This method works particularly well for evening dish loads. Run the dishwasher after dinner, crack it open during bedtime routines, and wake to dry dishes and slightly more comfortable air.
Keep Your Water Fresh (Not Frightening)
Passive methods work beautifully, but they come with one non-negotiable requirement: clean water that gets refreshed regularly.
Stagnant water becomes a breeding ground for bacteria within days. Nobody wants to solve dry air by introducing new health concerns into their home.
Replace water bowls every 1–3 days. Mark your calendar, set a phone reminder, or tie the task to an existing routine like Monday morning coffee or Thursday grocery runs.
Wipe containers weekly with soap and water. This removes the thin film that builds up where water meets air—a film that harbors microorganisms and reduces evaporation efficiency.
For families managing multiple bowls throughout the home, consider using containers in different colors or styles so you can track which ones need attention. A blue bowl in the bedroom, a white dish in the living room, a ceramic platter in the nursery—visual cues help busy parents stay on top of the rotation.
This hygiene routine takes five minutes weekly but ensures you're adding beneficial moisture rather than creating what one Reddit user aptly called "a gross science experiment."
Kid- and Allergy-Friendly Natural Humidification with Plants (Transpiration You Can See)
Plants do more than look pretty on your window sill. Every leaf acts as a tiny moisture pump, pulling water from soil and releasing it as vapor through a process called transpiration.
This isn't some subtle, theoretical benefit. Place your hand near a well-watered Boston fern on a dry winter day—you can actually feel the difference in air moisture around the foliage.
Why Grouping Plants Creates Humid Micro-Zones
A single plant releases moisture, but clustering multiple plants together creates what "their own little humid oasis."
The vapor released by one plant mingles with moisture from its neighbors. This concentrated humidity stays localized around the grouping rather than immediately dispersing throughout the room.
For families, this matters most in targeted spaces. A corner of your child's bedroom where they read before bed. The nursery changing table where you spend 20 minutes multiple times daily. Your own bedside table where dry air makes your throat raw by 3 a.m.
Strategic plant groupings can noticeably improve comfort in these smaller zones, even if they don't dramatically shift whole-room humidity levels.
Choose Plants That Actually Deliver Moisture
Not all houseplants transpire equally. Some species release significantly more water vapor than others—and those are the ones worth your investment.
Focuse on these proven humidity helpers:
-
Boston fern: releases substantial moisture but needs consistent watering
-
Peace lily: tolerates lower light while still transpiring effectively
-
Spider plant: nearly impossible to kill and produces baby plants you can propagate
-
Rubber plant: large leaves mean more surface area for water release
-
Lady palm: slower growing but extremely reliable
Here's the catch that matters: these plants only help if they're adequately watered and healthy. A neglected, half-dead peace lily with brown leaf tips isn't transpiring anything useful.
Check soil moisture every few days. Most of these species prefer soil that stays slightly damp (not soggy). Establish a watering routine tied to something you already do—Sunday meal prep, Wednesday afternoon pickup, Friday morning coffee.
The Pebble Tray Setup That Amplifies Plant Humidity
You can double the moisture output from your plant grouping with a simple setup that takes five minutes to arrange.
The pebble tray method works by creating an evaporation zone directly beneath and around your plants:
-
Choose a shallow, waterproof tray larger than your pot's base—a plant saucer, baking dish, or decorative tray all work
-
Fill the tray with pebbles, stones, or marbles to create an elevated platform
-
Add water until it reaches just below the top of the stones—the pebbles should break the water surface
-
Place your potted plant on top of the pebbles so the pot bottom sits above the waterline
This setup prevents root rot (the pot never sits in water) while maximizing evaporation. Moisture rises continuously around the foliage, and the plant's own transpiration adds to the effect.
Refill the tray every few days as water evaporates. You'll know it's working when you notice the water level dropping faster than you'd expect.
Set Realistic Expectations for Plant-Based Humidity
Plants help, but they're not magic. Understanding their limitations prevents disappointment and helps you combine them effectively with other strategies.
Aim for approximately two or more plants per 100 square feet for meaningful effect.
Plants work best in smaller, enclosed spaces. A bathroom with one window and a closed door responds beautifully to two ferns. A great room with vaulted ceilings and constant airflow? You'd need a greenhouse worth of foliage to move the needle.
Think of plants as part of your humidity toolkit rather than the complete solution. Pair them with bowls of water, strategic cooking steam, or the other passive methods covered earlier.
Place Plants Safely for Allergy-Conscious Families
Adding plants to increase humidity in a room shouldn't create new problems for family members managing allergies or asthma. Thoughtful placement and basic maintenance prevent plants from becoming allergen reservoirs.
Avoid clustering plants directly against cold exterior walls or windows. When warm, moist air from transpiration hits a cold surface, condensation forms. That persistent moisture encourages mold growth—exactly what you're trying to avoid.
Pull plant groupings at least 6–8 inches away from exterior walls, and don't shove them into tight corners where air can't flow.
Wipe dust off leaves weekly. Dust accumulates on foliage just like it settles on furniture, and those particles become airborne when you water or move plants. A damp cloth takes 30 seconds per plant and dramatically reduces the allergen load.
For families with severe allergies, start with one or two plants in a low-traffic area. Monitor symptoms for a week before adding more. Some people find certain species (like peace lilies) trigger reactions while others (like spider plants) cause no issues.
DIY "Mini Humidifiers" for Bedrooms
Dry air is often most noticeable at night.
The Fan + Damp Towel Method (High Surface Area, Low Cost)
This setup costs nothing if you already own a towel and a basic fan. The science behind it makes perfect sense once you understand surface area.
Wring out a towel until damp (not dripping), drape it over a chair back or drying rack, then aim a fan on low speed across the fabric.
Here's why fabric outperforms an open bowl of water by a massive margin. Water can only evaporate where it contacts air. A bowl presents one flat surface. But towel fibers create thousands of tiny water pockets, each exposed to airflow—dramatically multiplying the evaporation rate.
The fan accelerates the process by constantly replacing saturated air near the towel with drier air from across the room. You're essentially building an evaporative humidifier from household items.
Position the setup 3–4 feet from where your child sleeps. Close enough to benefit from the moisture, far enough to avoid any draft discomfort. Run it for 2–3 hours before bedtime, then turn off the fan once everyone's asleep.
Refresh the towel with clean water every night. Toss it in the wash every few days to prevent any musty smell from developing.
Curtain Misting for a Quick Overnight Bump
Misting curtains with water is "the simplest yet effective tip" for adding bedroom humidity.
Fill a clean spray bottle with water. Give your curtains 8–10 light mists from 12 inches away—you want them damp, not soaked. The fabric slowly releases moisture as it dries overnight.
Test this method on an inconspicuous corner first. Some curtain fabrics water-spot badly or develop rings when wet. If your test area dries without marks, you're safe to proceed.
Three important guardrails prevent problems:
-
Avoid spraying near wood window trim—water running down can stain or warp the finish
-
Skip this method entirely if you already see window condensation—you don't need more moisture
-
Never soak the fabric—damp works; dripping creates mold risk
This works beautifully in a child's room where you're doing a bedtime routine anyway. Mist the curtains while reading stories, and the moisture releases as they drift off to sleep.
Steam Clothing Care as Dual-Purpose Moisture
Garment steamers and steam irons release hot vapor that humidifies while you tackle wrinkles.
Run a steamer for 5–10 minutes in the room you want to humidify. Steam your work clothes for tomorrow, freshen the curtains, or smooth out wrinkles in bedding.
The moisture disperses quickly—this isn't a long-term solution. But it's remarkably effective during bedtime routines when you need a quick humidity bump before your family settles in for the night.
Steamers heat up in seconds and cost considerably less than dedicated humidifiers. They require no filters, no maintenance beyond occasional descaling, and they serve double duty for clothing care.
Nursery and Bedroom Safety Checklist
Adding moisture to bedrooms requires extra caution when young children are involved. The goal is controlled humidity, not "as much moisture as possible."
Keep these safety priorities front of mind:
-
Place all water containers completely out of reach—on high dressers, never on the floor near cribs
-
Route fan and steamer cords away from cribs and beds—tape them along baseboards if needed
-
Monitor for condensation on windows—persistent fog means you've added too much moisture
-
Stop if anyone develops new respiratory symptoms—excess humidity can trigger asthma in sensitive individuals
Aim to stay within the 30-50% range.
Keep Humidity In (Without Creating Mold)
Stop Paying to Humidify the Outdoors
Every crack around your windows and doors bleeds humidity straight outside. You're working hard to add moisture—boiling water, hanging laundry, misting curtains—only to watch it escape through gaps you can't even see.
Seal Air Leaks
Seal drafts before you invest energy in humidification methods. The payoff is immediate and measurable.
Run your hand slowly around window frames and door edges on a cold day. Feel for cold air streams. Light a candle and watch for flickering flames near suspected leak points.
Weatherstripping costs $10–15 per door and takes 20 minutes to install. Peel-and-stick foam tape seals most window gaps in seconds. For larger cracks, use rope caulk that you can remove in spring without damaging paint.
Here's the practical advantage: once you've plugged the leaks, humidity lingers 2–3 times longer. That bowl of water on the radiator actually makes a difference. Your morning shower steam benefits the bedroom down the hall instead of vanishing into the attic.
You can use smaller, gentler moisture methods because you're no longer fighting a losing battle against constant air exchange.
Use Simple Monitoring
Forget complicated humidity charts and hourly hygrometer checks. You need a monitoring system that fits into your already-packed schedule.
Start with one baseline tool: a standalone hygrometer placed away from moisture sources. Check it once when you wake up and once before bed. You're aiming for 30–50% relative humidity.
These are two quick visual checks that tell you everything you need to know:
Check #1: Your windows in the morning. Persistent fog or condensation running down the glass means you've crossed into "too humid" territory. Your air can't hold any more moisture, so it's condensing on the coldest surface available.
Check #2: Your throat when you wake. If it feels painfully dry and scratchy every morning despite drinking water before bed, your humidity has dropped too low overnight.
Adjust by changing one thing at a time. Add a bowl of water near the heater if throats are dry. Remove the simmering pot if windows are fogging. Wait 2–3 days to see the impact before making another change.
This approach respects your reality as a parent—you don't have time to obsess over decimal-point humidity readings. You need quick signals that tell you when to act.
Prevent Mold With Circulation and Cold-Surface Awareness
Adding humidity solves one problem but can create another if you're not careful about where moisture settles.
Mold thrives when water vapor condenses on cold surfaces and sits there. Controlling moisture means controlling where it goes, not just how much you add.
Cold exterior walls and poorly insulated windows are mold magnets. When warm, humid air hits these cold spots, it condenses instantly—creating the exact wet environment mold spores need to colonize.
Pull furniture 3–4 inches away from exterior walls. That dresser shoved tight into the corner blocks airflow and creates a cold, damp pocket where mold can establish before you even notice.
Increase air circulation in rooms where you're adding moisture. Crack bedroom doors at night so air moves between spaces. Run ceiling fans on low to keep air mixing rather than stratifying into humid and dry zones.
Consider warming cold spots where condensation repeatedly forms. A small space heater aimed at a perpetually damp corner can raise surface temperatures enough to prevent condensation. Adding insulation to problem walls pays long-term dividends.
The goal is controlled moisture that improves comfort without creating hidden mold colonies behind furniture or inside wall cavities.
When Natural Methods Aren’t Enough
If you're evaporating multiple bowls of water daily, running steam constantly, and still can't crack 30% humidity, you may need additional support.
Very dry climates, constant heating, or older homes can make it difficult to maintain humidity naturally.
In those cases, a humidifier can help stabilize moisture levels—especially in bedrooms or high-use areas.
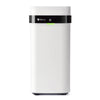
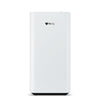
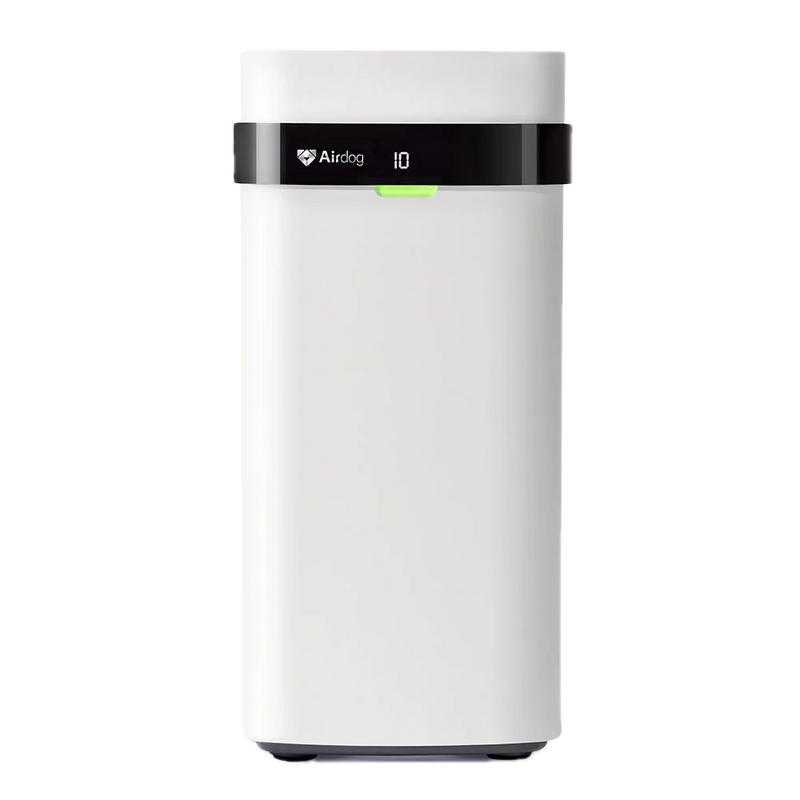
For a more consistent approach, systems like Airdog’s MOI humidifier are designed to maintain balanced humidity without constant refilling or guesswork. Instead of relying on short bursts of moisture, it helps keep levels steady throughout the day—so your space stays comfortable, not overly damp or inconsistent.
The Bottom Line
Increasing humidity in a room doesn’t require complicated solutions.
Focus on:
-
Using moisture you already create
-
Adding simple passive methods
-
Improving airflow and sealing leaks
Small changes add up quickly.
And if your home needs more consistent support—especially during peak winter dryness—a solution like Airdog’s MOI humidifier can help maintain balanced humidity levels without the constant effort of manual methods. It’s a simple way to keep your air comfortable while still sticking to a clean, low-maintenance routine.